
How to build a site using the WordPress platform, including a guide to using WordPress and a list of available modules
Maintaining a Site
How to ensure continued high quality content on your website using various tools provided in WordPress
Template Landing Page
Sample landing pages for you to emulate on your site.
Building Our Brand
Guidance on presenting the Magellan brand via the WordPress platform and internal ‘rules’ for Marketing teams to follow as they build pages.
Log In
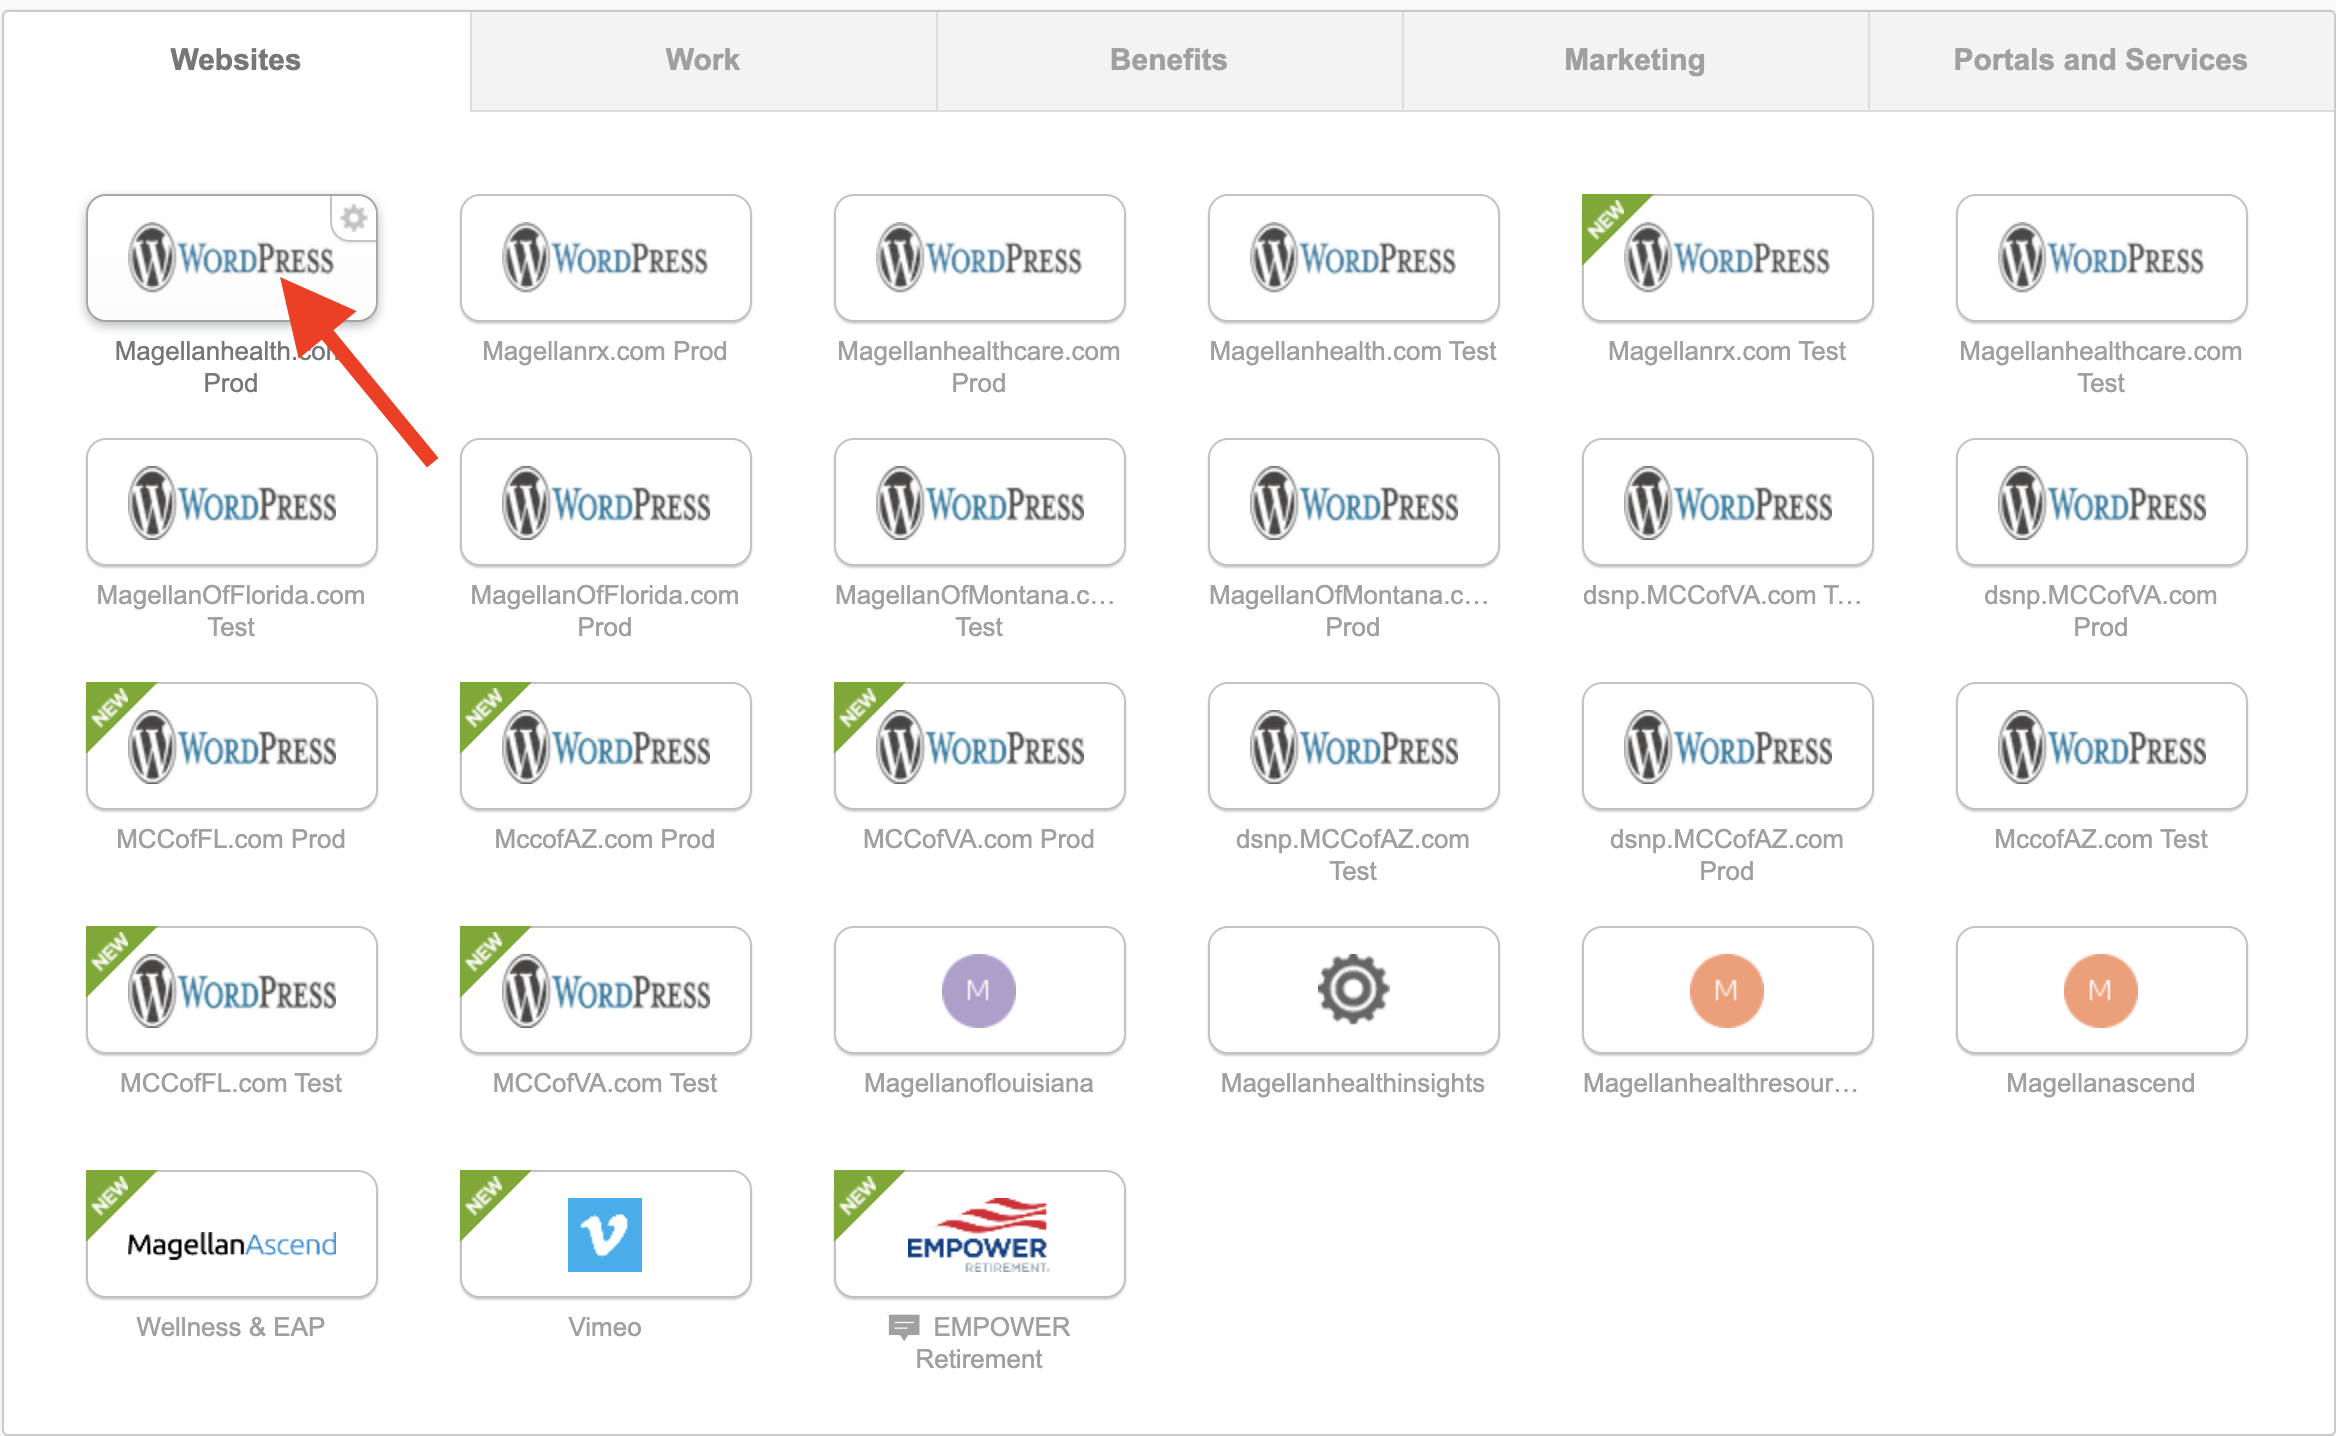
Begin by logging into the administration area by clicking on your website’s tile in OKTA. (If you do not have an OKTA tile for your site, please submit a ticket through RITA)
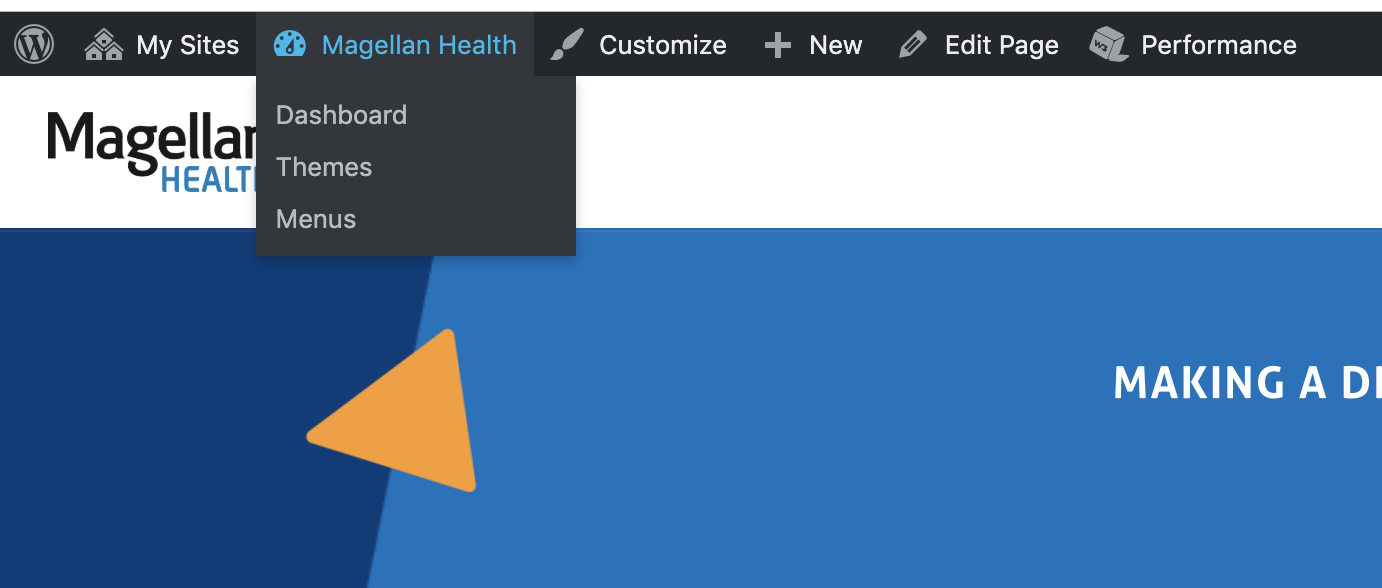
You will be taken to your website, but the editor’s toolbar will now appear at the top of the screen. Scroll over the website name and click on dashboard.
Dashboard
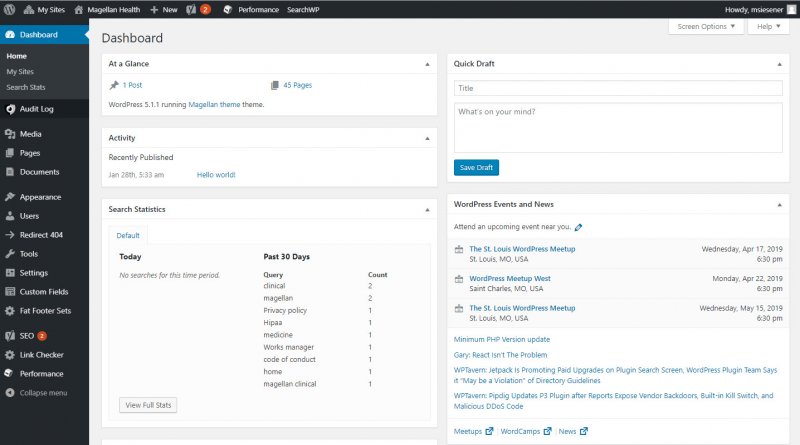
The Dashboard is where the organization of the site begins. At the top of the screen is the area called the toolbar.
The Dashboard features a list of the most recent activity you’ve accomplished on your site and it helps to keep you up to date on new and interesting bits of information from the many WordPress resources.
On the left side of the screen is the main navigation menu detailing each of the administrative functions you can perform. Move your mouse down the list and the sub-menus will “fly out” for you to move your mouse to and click. Once you choose a “parent” navigation section, it will open up to reveal the options within that section.
The various menu items are as follows:
- Dashboard
- Media
- Pages
- Documents – Same as media, but used to store actual documents like Word files or PDFs.
- Appearance
- Users
- Tools
- Settings
MediaMedia
The Settings Media Screen allows you to determine how images, documents, and other media files will be organized when uploaded, and to specify the maximum dimensions in pixels to use when inserting an image into the body of a post.
PagesAll Pages
The All Pages Screen provides the necessary tools to edit, delete or view existing Pages. On this Screen you can select the Page to edit, delete or view. Multiple Pages can be selected for deletion and for editing. A powerful bulk edit tool allows certain fields to be edited for a whole group of Pages. A handy in-line edit tool, called Quick Edit, allows you to update many fields for an individual Page. Various search and filtering options allow you to find the Pages you want to edit or delete.
Add New PageAdd New Page
The Add New Page Screen allows you to create new Pages.
PermalinksPermalinks
WordPress offers you the ability to create a custom URL structure for your permalinks. This can improve the aesthetics, usability, and forward-compatibility of your links.
Content Visibility
Content visibility is about controlling who can see your blog content. WordPress allows you to control the visibility of your posts and pages on an individual basis. By default, all posts and Pages are visible.
There are several ways to set the visibility for your blog content. You can set it on a per post/Page basis for public, private, or Password Protected, or make the entire blog private and Password Protected through the use of WordPress Plugins.
Setting Page and Post VisibilitySetting Page and Post Visibility
Visibility for posts and Pages is set from the Edit screen. The option is available under the “Publish” option normally found at the top-right of the Edit screen. The screenshot below shows the interface, with the relevant section highlighted in the red rectangle.

The default state for post and Page visibility is Public. Public visibility means that the content will be visible to the outside world as soon as it is published.
By clicking on the edit link next to Visibility: Public in the Publish options, you can choose from an expanded selection of visibility options.

The options are:
- Public: The default, viewable to all.
- Password Protected: Clicking this radio button followed by “OK” causes a further text box to appear, into which you can enter a password.
- Private: This option hides the content from the public completely.
Password Protected ContentPassword Protected Content
Password Protected content is not immediately visible to the outside world. Instead, visitors will see a prompt similar to this:

The title for your protected entry is shown, along with a password prompt. A visitor to your site must enter the password in the box in order to see the content of the post or Page.